[ad_1]
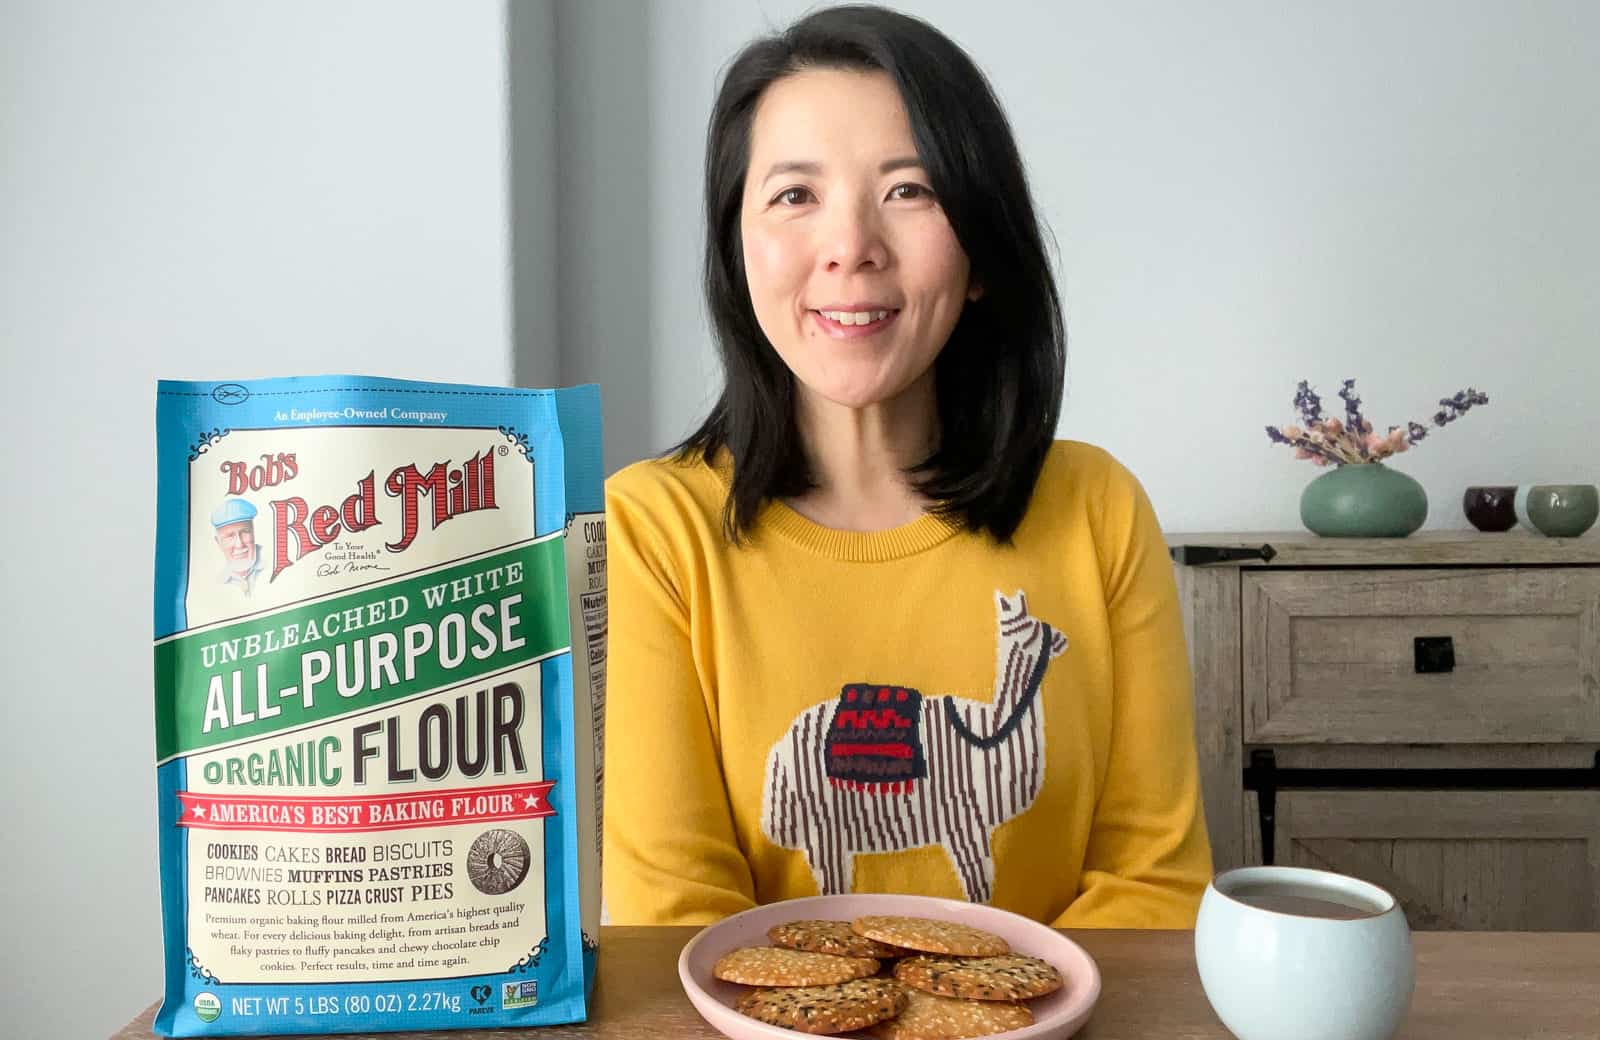
Thanks to Bob’s Crimson Mill for sponsoring this submit!
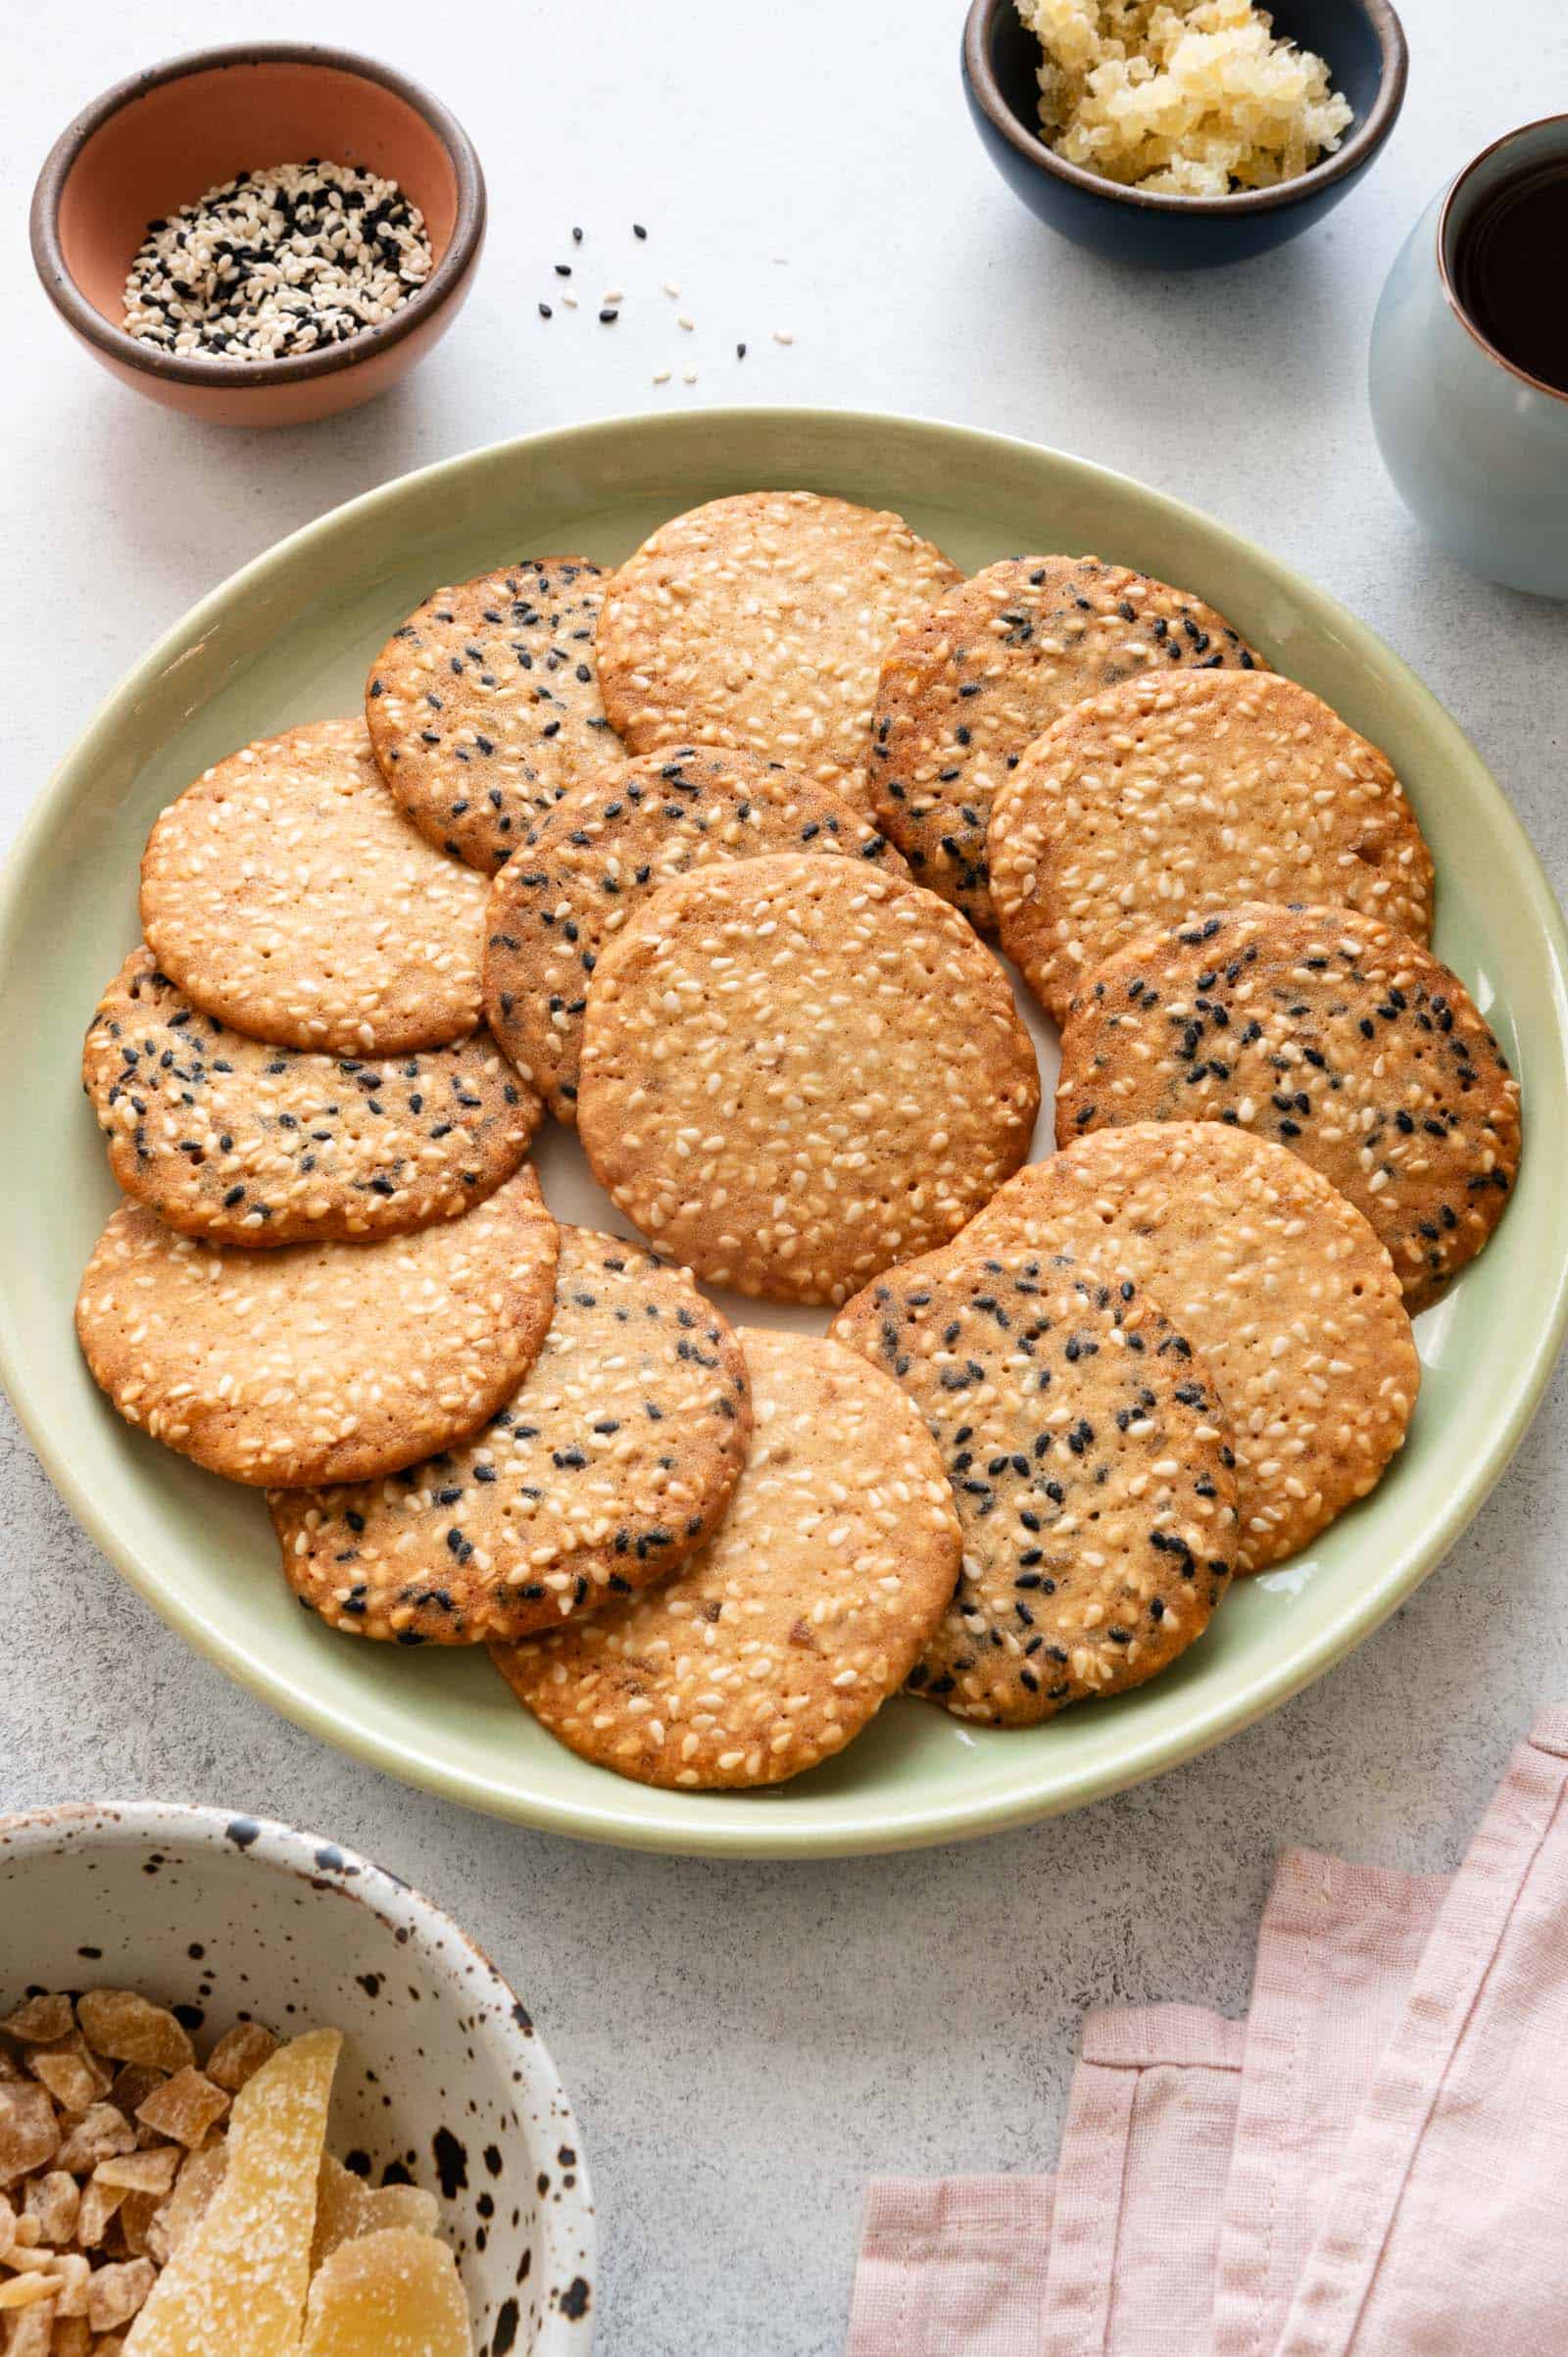
Each time I go to my household in San Francisco, I all the time make treats for them to take pleasure in. My household typically has a candy tooth, however they’ve needed to watch their sugar consumption in recent times on account of well being points. That’s why I strive to not put together meals which are too candy. These ginger and sesame cookies are simply the type factor my household will take pleasure in. They’re crispy, nutty, barely candy, and have a little bit of zingy ginger taste.
In San Francisco, there’s a Chinese language bakery known as 小麥田 (Fancy Wheat Area) that sells skinny sesame cookies topped with numerous white sesame seeds and have a pleasant snappy crisp. My sister buys them on a regular basis. Drawing inspiration from the sesame cookies at 小麥田, Kristina Cho’s sesame crisps recipe from Mooncakes & Milk Bread, and some different Chinese language sesame cookie recipes, I went to work growing this ginger and sesame cookie recipe.
I will need to have examined about 15 batches of cookies to experiment with find out how to incorporate ginger taste into the cookies, find out how to obtain the most effective snap within the cookies, and what number of sugar to make use of. In consequence all my testing, I’ve copious quantities of cooking notes, which I clarify additional beneath.
COOKING NOTES FOR GINGER & SESAME COOKIES
USING BOB’S RED MILL FLOUR
Bob’s Crimson Mill Natural Unbleached White All-Objective Flour is my go-to flour for lots of my recipe growth. I exploit it to make dumpling wrappers, noodles, milk bread, cinnamon rolls, and so many extra recipes! It’s a high quality flour that produces constant outcomes and it’s very handy to search out. Mama Lin loves utilizing Bob’s Crimson Mill flours as nicely! Though this sesame cookie recipe makes use of much less flour than you’d count on, all-purpose flour is however a key element in giving the cookies its crispy texture.

ADDING GINGER FLAVOR
My household loves something with ginger taste, so I wished to infuse a very good quantity of ginger taste into these cookies. I began experimenting with including floor ginger to the cookies, however I assumed the flavour was too refined. Then, I attempted including 1 tablespoon of freshly grated ginger, pondering it could add a stronger taste. Surprisingly, the recent ginger wasn’t that noticeable. I lastly added chopped crystallized ginger into the cookie batter, which gave the cookies the correct amount of taste I used to be searching for. The ginger taste isn’t too overpowering, however you’ll be able to style the zingy taste in every chunk.
On the grocery retailer, you’ll doubtless discover 2 widespread forms of crystallized (or candied) ginger: chopped up ginger chunks with a white powdery exterior or slices of candied ginger with granulated sugar coating the outside. Each varieties of crystallized ginger work nicely for this recipe. Nevertheless, the candied ginger slices are usually stickier, in order that they’re a bit of tougher to cut up. Use whichever crystallized ginger you could find!
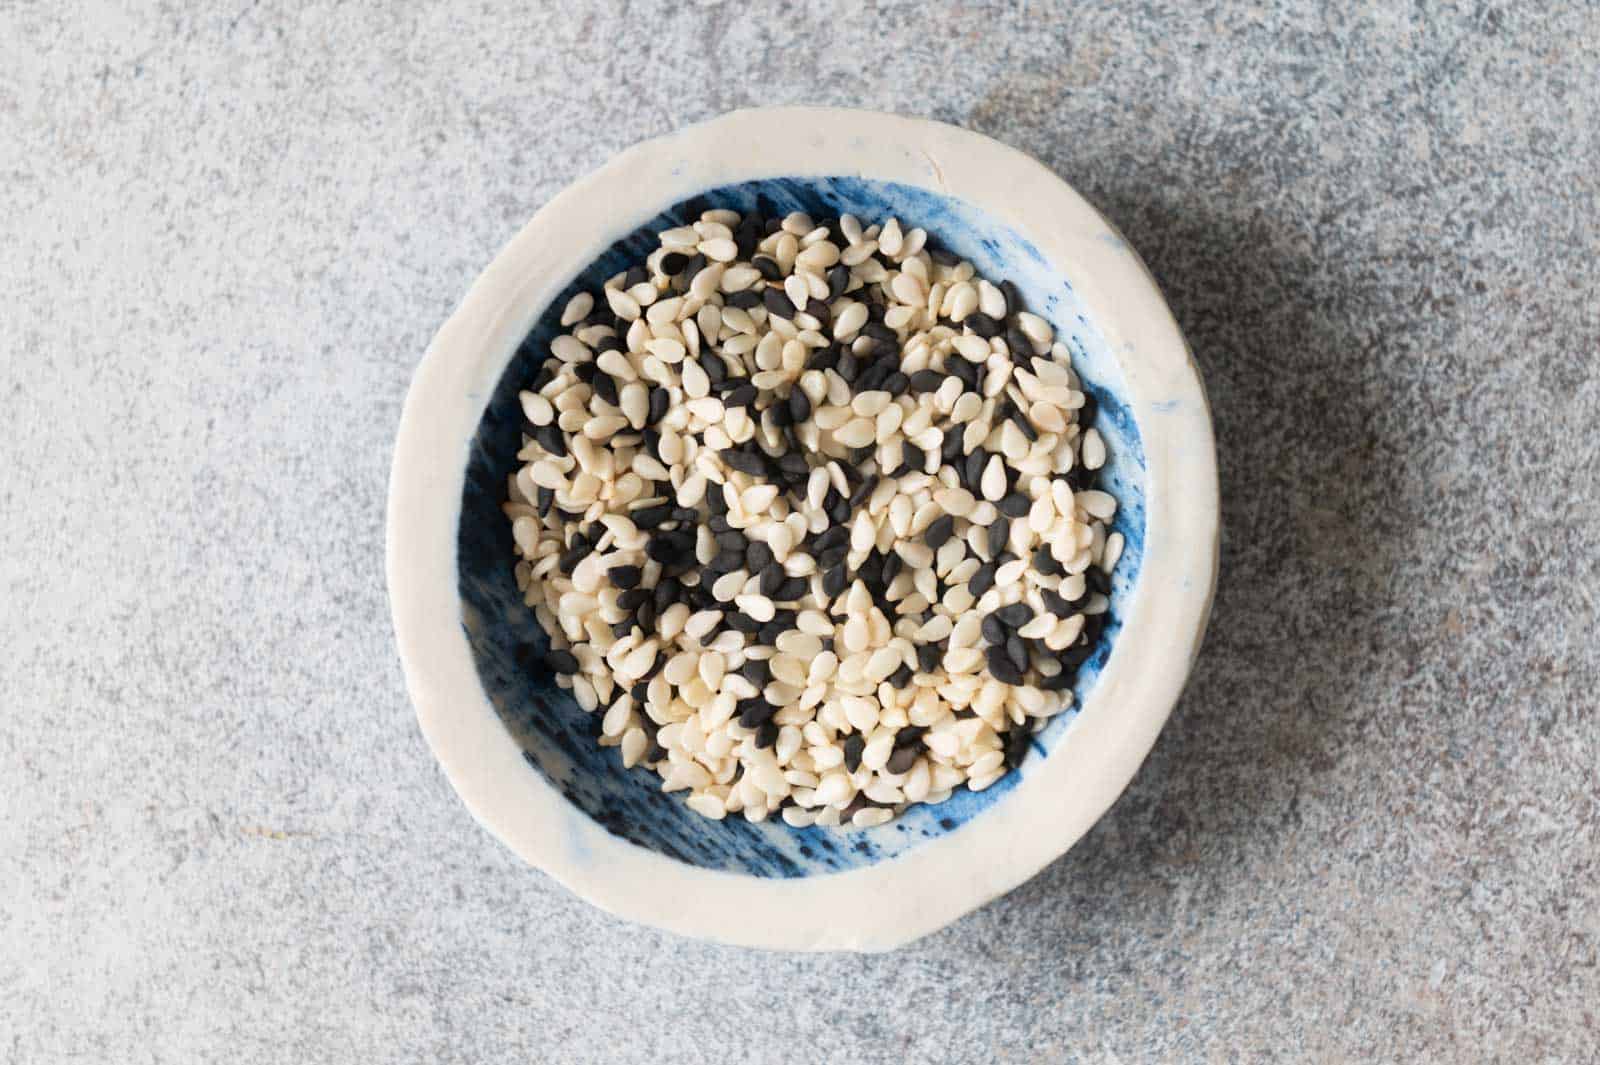
SESAME SEEDS
Chinese language sesame cookie recipes usually use white sesame seeds, however you should use a combination of white and black sesame seeds for visible distinction within the cookies. Black sesame seeds are usually barely extra bitter than white sesame seeds. Due to this fact, when you use a mix of white and black sesame seeds, I like to recommend utilizing barely extra white sesame seeds (I specify the quantities within the recipe notes).
If attainable, use uncooked sesame seeds for the recipe, and toast them for a couple of minutes earlier than including to the cookie batter. I usually purchase uncooked sesame seeds from Asian grocers.
After I examined the primary few batches of this recipe, I used pre-roasted seeds from a jar in my pantry. The issue, I found, was that pre-roasted sesame seeds are inclined to go stale shortly after opening the jar. As a result of this sesame cookie recipe makes use of a substantial quantity of sesame seeds, the stale taste of the seeds turned fairly pronounced. That is much less of a problem when you toast uncooked seeds for the cookies.
Nevertheless, if roasted sesame seeds are all you could find, by all means, use them. I like to recommend toasting them in a pan over medium warmth for two minutes earlier than including to the batter.

EXPERIMENTING WITH DIFFERENT SUGARS
I examined this recipe with quite a lot of sugars and syrups, together with brown sugar, maple syrup, powdered sugar, and granulated sugar. Initially, I assumed the brown sugar and maple syrup would add depth to the flavour of the cookies. Whereas the cookies had barely richer taste, the darker sugars browned the cookies in ways in which I didn’t like. The cookies had extra of a grayish-brown hue as an alternative of the golden brown shade I wished (see photograph above).
Subsequent, I began testing the cookies with powdered sugar, which labored positive. As I mirrored on the recipe extra, I noticed that persons are extra prone to have granulated sugar of their pantry versus powdered sugar, so I switched to utilizing granulated sugar as an alternative.
CHILLING THE BATTER
Technically, you’ll be able to bake the cookies instantly after you make the batter/dough, however it’s higher to sit back the batter earlier than baking. The cookie batter is sort of runny proper after you end mixing all of the substances. While you attempt to switch that runny batter onto a lined baking sheet, the batter begins spreading into an amorphous form.
That’s why I made a decision it was greatest to sit back the batter within the fridge for at the least a number of hours (or in a single day). As soon as chilled, the batter will grow to be extra like a cookie dough consistency and be a lot simpler to switch to the sheet pan and form. If refrigerating the batter for a number of hours is an excessive amount of time, you’ll be able to chill the batter within the freezer for about 30 to 45 minutes, till it stiffens up like cookie dough.
FLATTENING THE DOUGH BEFORE BAKING
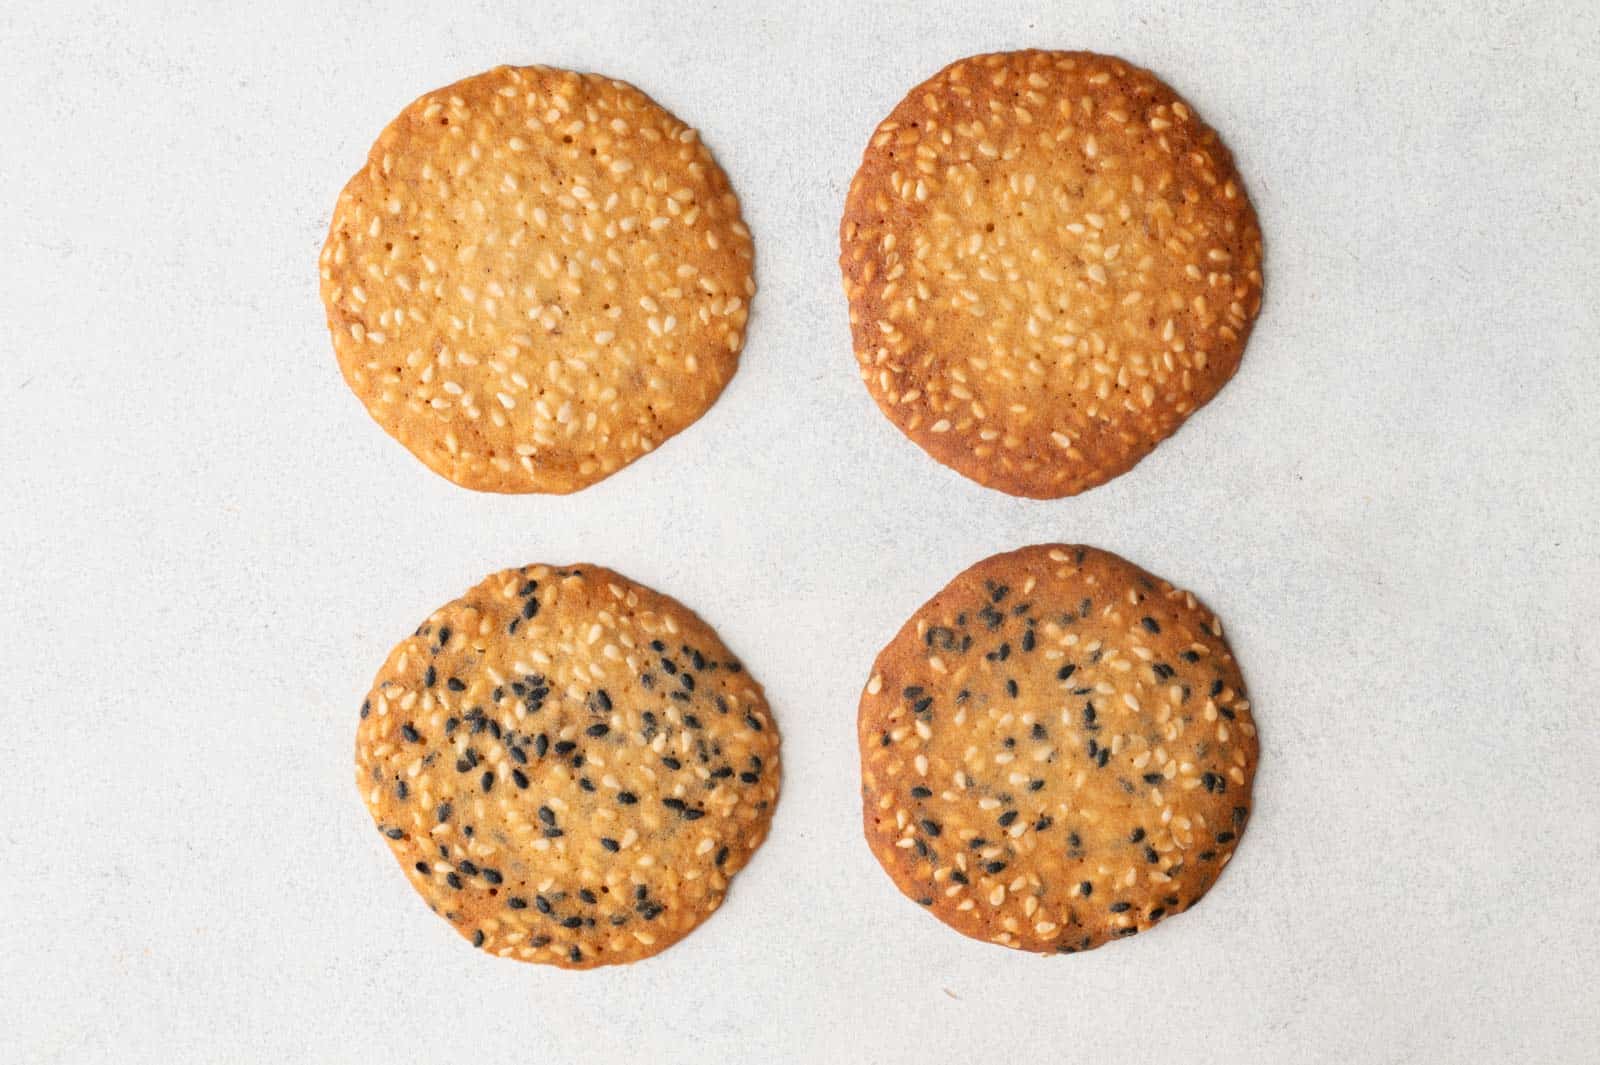
Throughout my earlier check batches, I scooped cookie dough onto lined baking sheets and baked the cookies with out shaping the dough additional. Though the cookies seemed good and spherical as soon as baked, they tended to kind domes within the middle, resulting in chewy facilities. Chewy facilities will not be a pleasing texture for such a cookie. I wished the cookies to snap properly, so I began experimenting with flattening the cookie dough into discs earlier than baking.
Check out the photograph above, which compares sesame cookies that I baked with out flattening the dough (prime cookies) and cookies baked after flattening the dough (backside cookies). The cookies that I baked with out flattening tended to not unfold as a lot, resulting in barely thicker facilities. The variations will not be dramatic visually, however they made an enormous distinction in texture. Flattening the dough earlier than baking the cookies yielded cookies with crispier texture.
There are a number of methods you’ll be able to flatten the cookies. I like to make use of a greased mini silicone spatula to flatten the cookies, because it provides me essentially the most management. Furthermore, the dough doesn’t stick with silicone spatula as a lot as after I use a greased offset spatula.
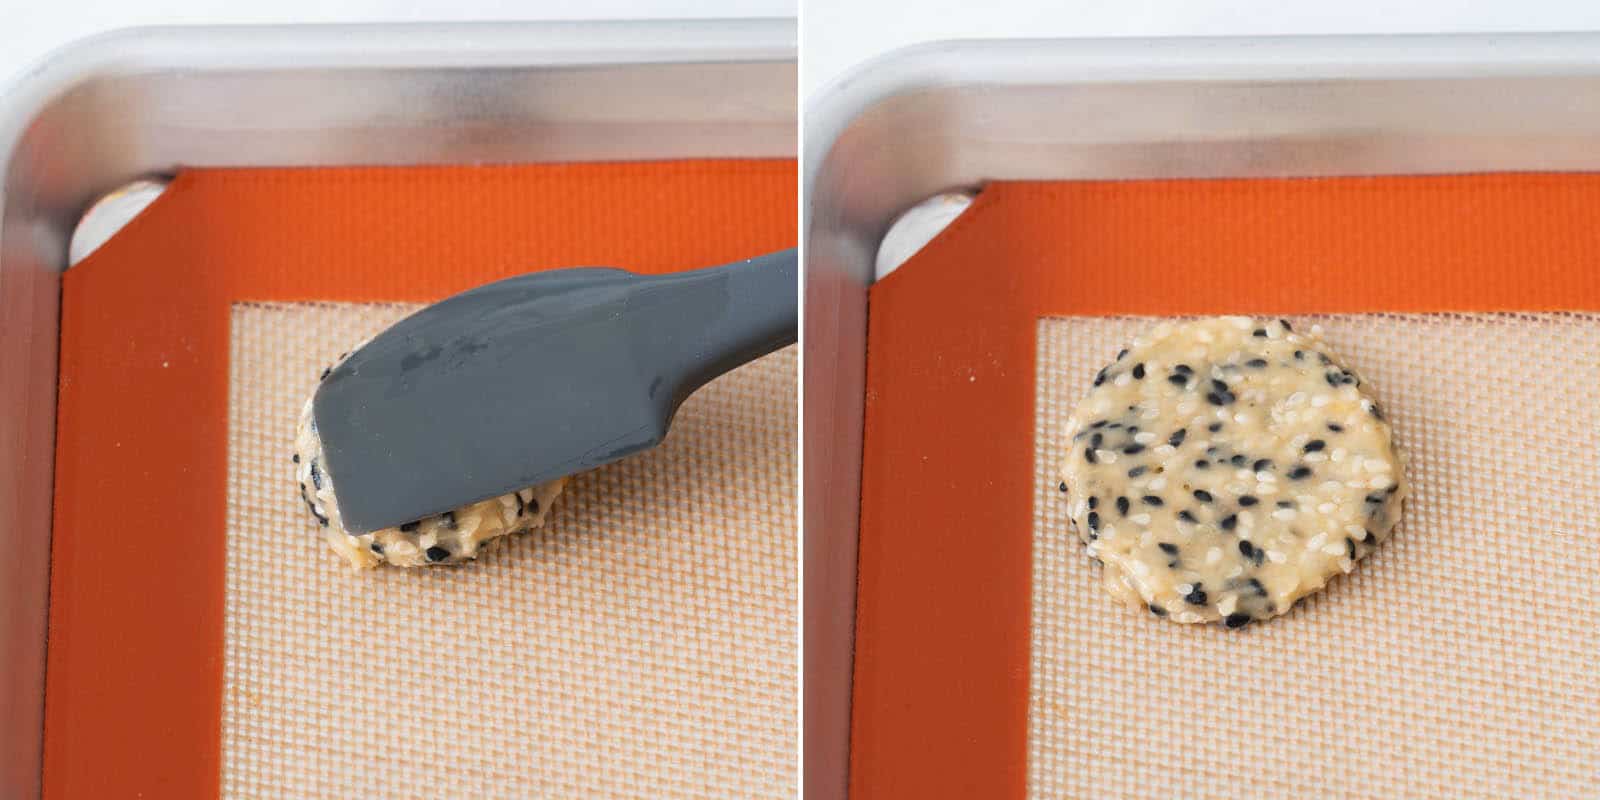
Begin by gently urgent the spatula down on a bit of cookie dough. Then, raise the spatula and press down on one other a part of the cookie to flatten it. Preserve urgent and lifting the spatula till you get a flat disc of about 2 inches in diameter. Resist the urge to pull the spatula over the cookie dough to attempt to form it right into a circle. The dough will stick with the spatula extra shortly this manner.
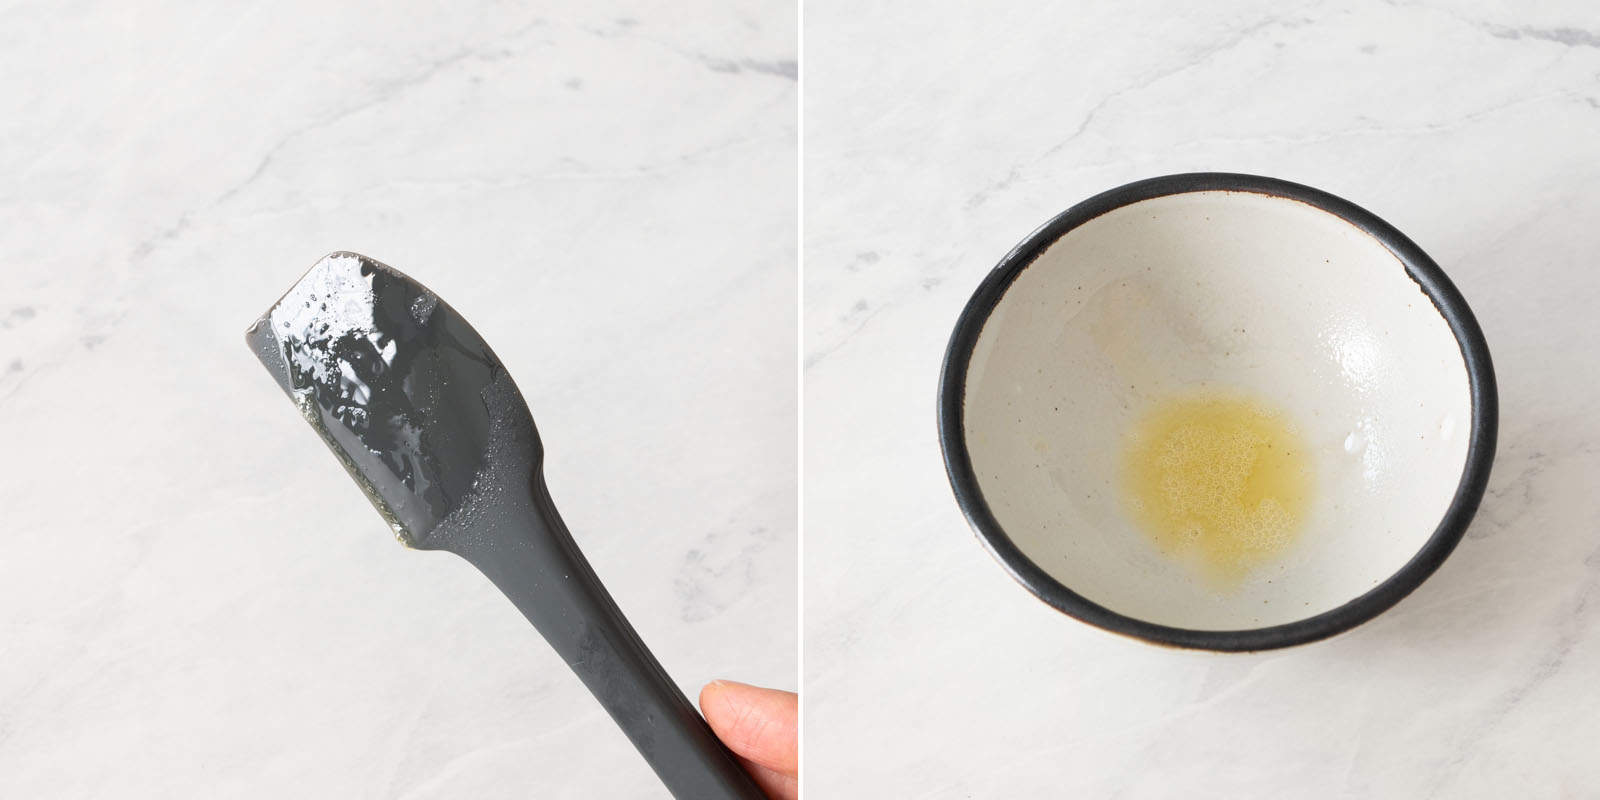
As a result of the dough is sticky, be sure to spray the spatula with cooking spray earlier than urgent the spatula onto the cookies. I additionally like to use cooking spray right into a separate bowl in order that I can simply reapply extra spray onto the spatula with my fingers. Oil works too, however you’ll must reapply the oil extra typically.
A barely simpler methodology is to flatten the dough with the underside of a ingesting glass or measuring cup. Grease the bottoms of the glasses/measuring cups with cooking spray earlier than flattening the cookies. Then, press the bottoms of the glasses or measuring cups over a bit of dough to flatten it. Though this methodology is quicker, the flattened dough may be inconsistent in form. Use a greased spatula or a greased butter knife to shift the perimeters so that you just get a pleasant round disc.
PORTIONING THE DOUGH
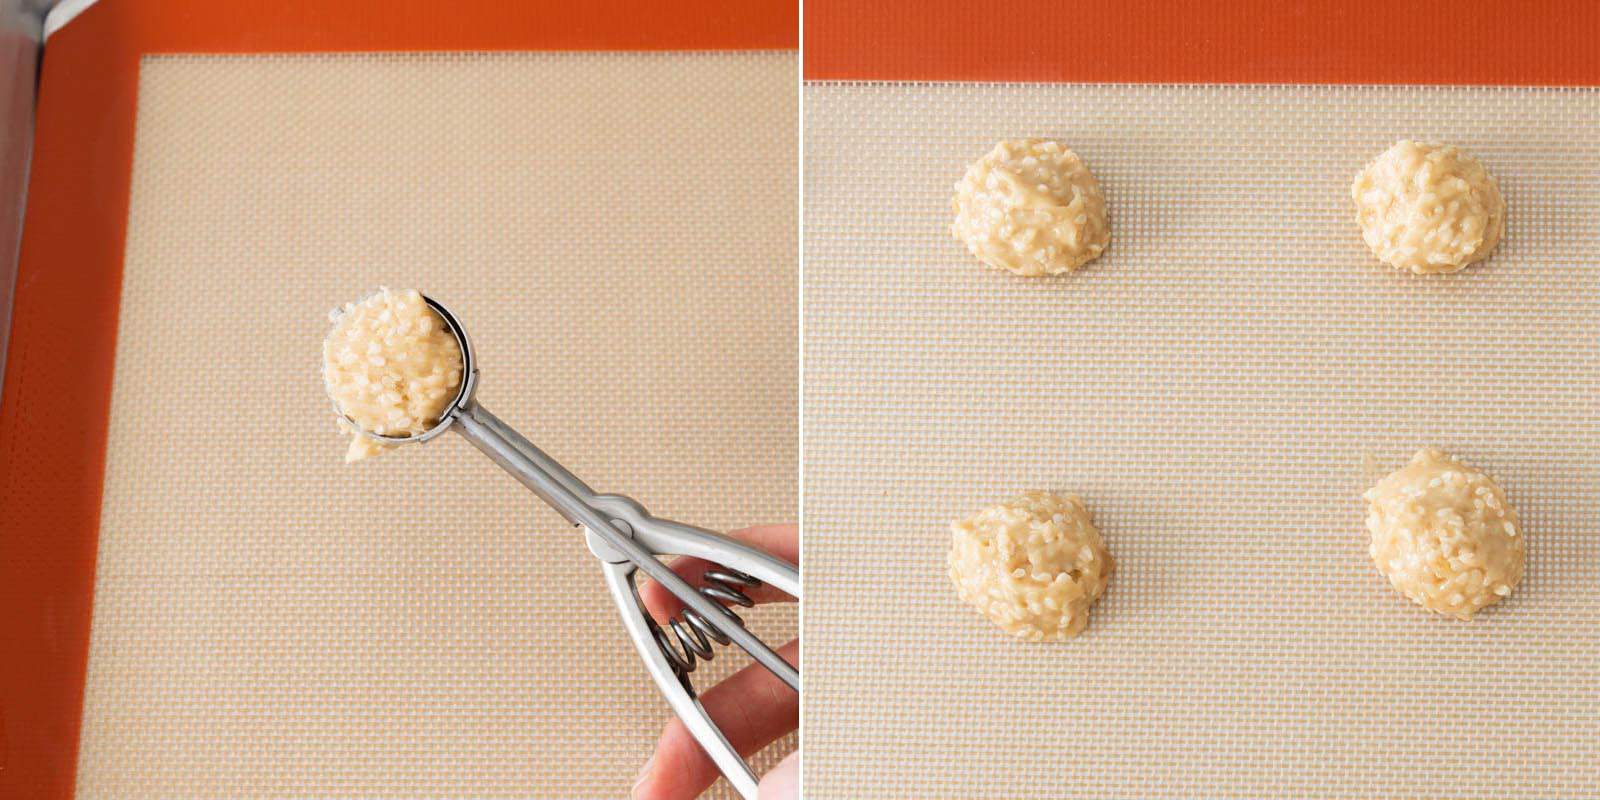
I used a small cookie scoop to portion out every cookie (every portion is about 2 teaspoons). Proper after scooping up the dough, I degree off the highest with a spatula, in order that I can get between 23 to 24 cookies. As a result of the dough is barely sticky, chances are you’ll must squeeze the set off just a few instances to launch the dough onto the baking sheet.
In the event you don’t have a small cookie scoop, you should use measuring spoons to portion out 2 teaspoons of dough (or use a 1 tablespoon measure for barely bigger cookies). I like to recommend spraying the within of the spoons with cooking spray in order that the dough releases simply.
BAKING TIME
Whereas the cookie batter is comparatively straightforward to arrange, the trickiest a part of this recipe is nailing down the cooking time to your oven. All of our ovens are totally different, with varied sizzling spots, so it’s tough to put in writing exact instructions for a sesame cookie recipe the place even warmth distribution is essential.
I bake from an electrical double oven, with oven slots which are barely smaller than typical slide-in ovens. I requested my assistant to check the recipe of their fuel oven that’s extra normal in dimension. My assistant seen that the cookies wanted a number of extra minutes of baking time, in comparison with the cookies baked in my oven.
Within the recipe beneath, I’ve supplied cooking instances, however use these as a information. It’s extra essential to concentrate to how the cookies look. After I take the cookies out of the oven, I’m searching for 2 issues: (1) how do the cookies take a look at the highest and (2) how does the underside look? From the highest, if the perimeters are golden however the facilities are nonetheless fairly pale yellow (not an excessive amount of darker than once they first went into the oven), the cookies most likely want just a few extra minutes within the oven.
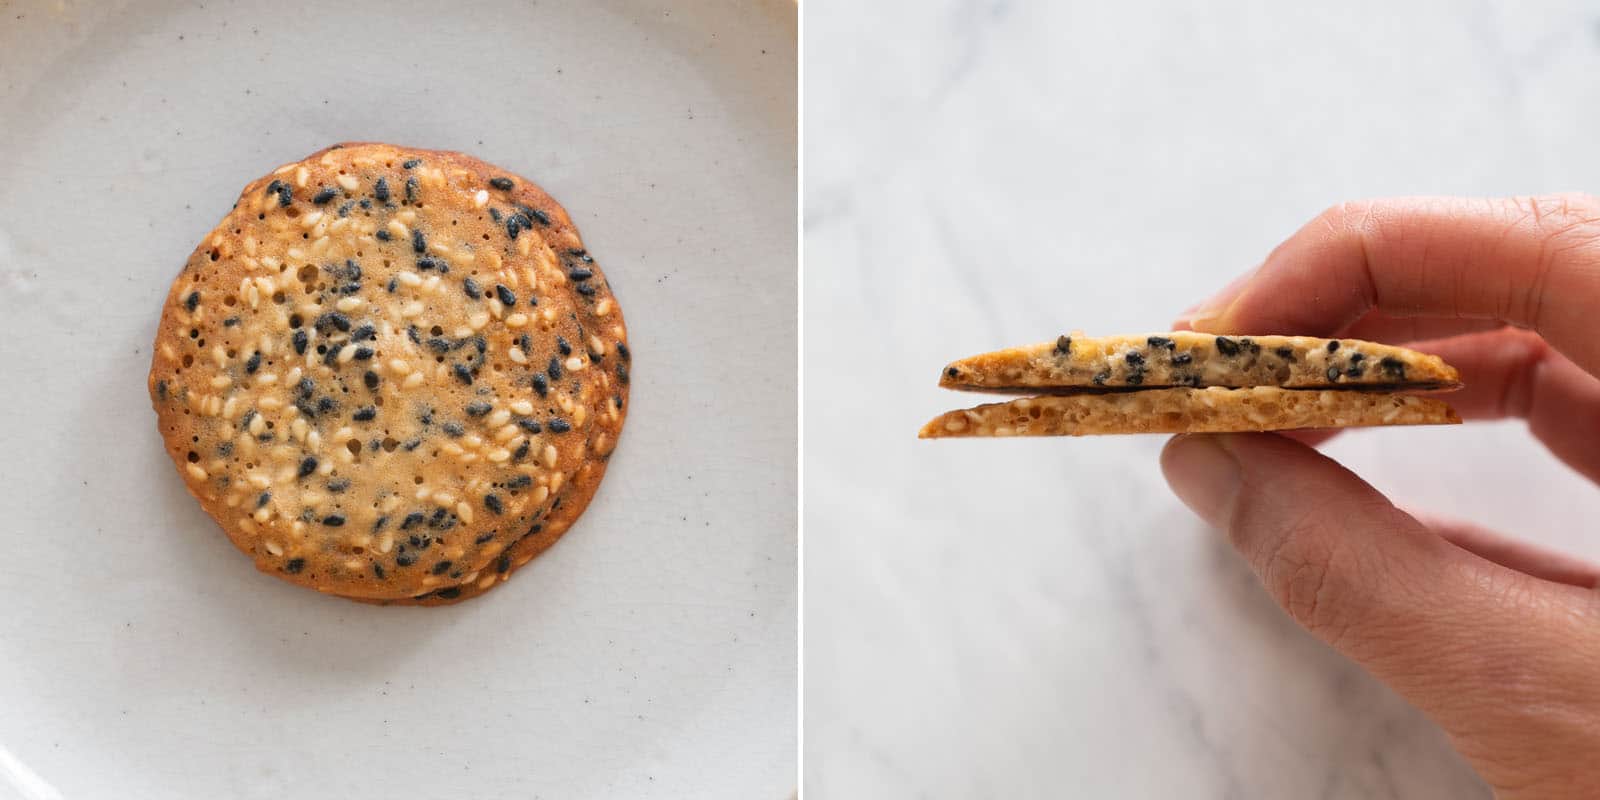
The photograph beneath depicts the perfect shade of the cookies from the highest. Cookies baked on the decrease temperature (275ºF) are inclined to have extra even browning. Conversely, cookies baked at a barely increased temperature (300ºF) tends to have darker edges and a lighter coloured middle. If they’re barely much less golden than what you see right here, that’s positive. The subsequent step is to check out the underside of the cookies.
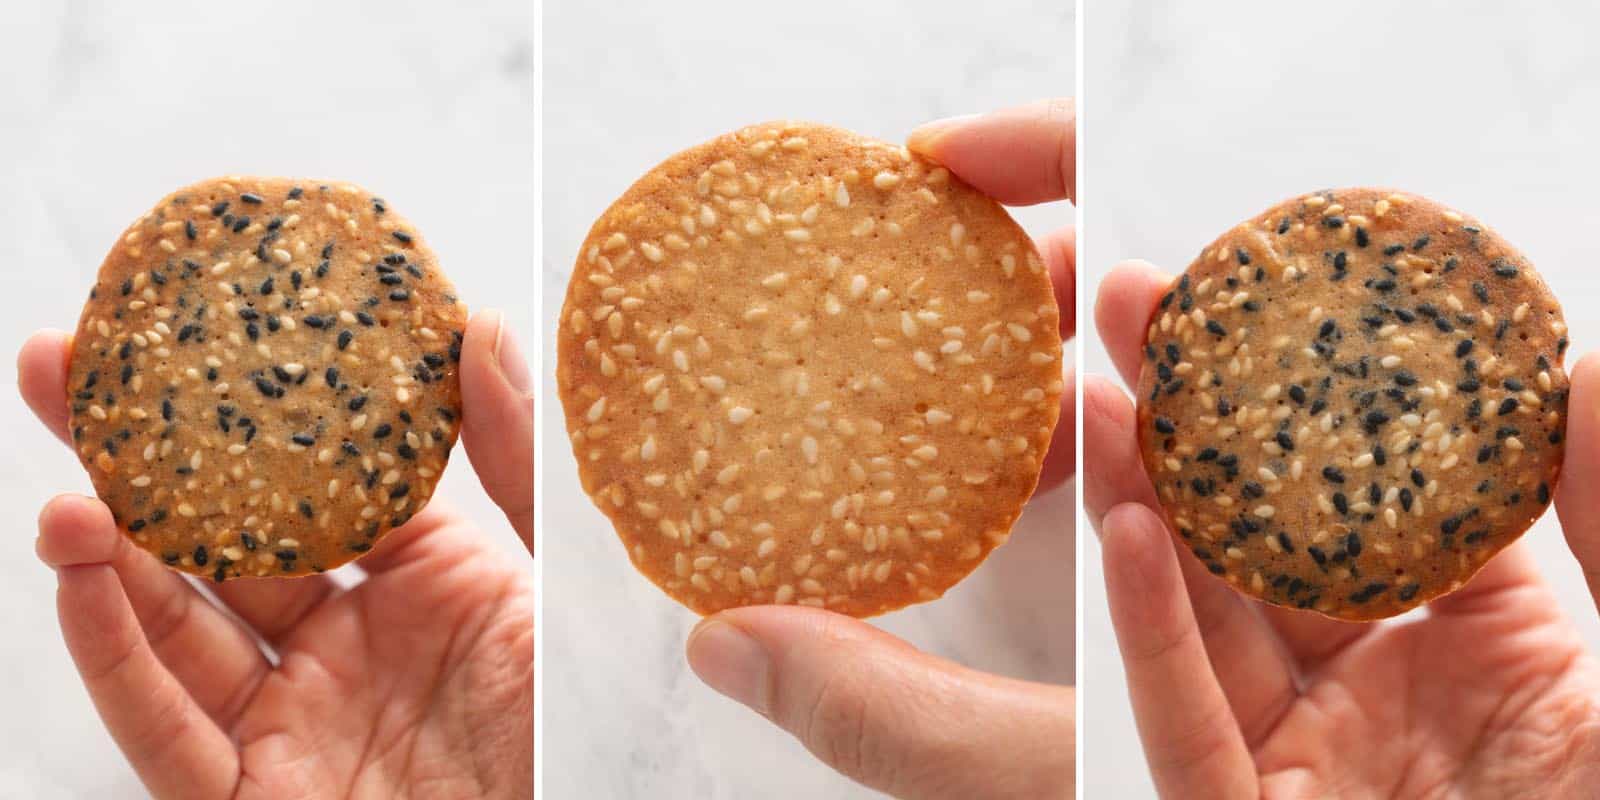
For cookies to get a pleasant snap, they need to look golden on the backside with out too many giant pale spots (see photograph beneath). The cookies generally is a contact lighter in shade than what you see beneath, however they undoubtedly shouldn’t look pale.

BAKING TEMPERATURE
After I first examined the recipe, I baked the cookies at 350ºF (176ºC). I seen that the cookies browned in a short time across the edges, however the facilities nonetheless seemed fairly pale, leaving the cookies chewy within the middle. I wished the cookies to snap nicely all through the cookie, so I began experimenting with reducing the cooking temperatures.
Ultimately, I’ve concluded which you can bake these cookies at both 300ºF (148ºC) or 275ºF (135ºC). I do know it isn’t regular for cookie recipes to provide you a selection by way of baking temperature, however I feel this genuinely is determined by your desire.
I desire baking these at 275ºF for an extended interval as a result of the cookies browned much more evenly, yielding cookies that have been essentially the most visually interesting, and ones that I might give to different individuals.
Nevertheless, my assistant most popular the cookies baked at 300ºF for a shorter interval as a result of the cookies browned extra, resulting in cookies with richer taste. Word nonetheless, that cookies baked at this temperature tends to have edges which are extra brown than the middle. I’ll depart the selection as much as you as as to whether you need cookies that look higher or cookies that style extra caramelized.
Whichever baking temperature you select, bake these cookies one baking sheet at a time (i.e., don’t bake 2 sheets of cookies on the identical time). The cookies is not going to bake as evenly, and the cooking instances will appear method off.
USING SILICONE MATS VS PARCHMENT PAPER
I like to recommend lining your baking sheets with silicone mats, when you’ve got them. Silicone mats encourage the dough to unfold extra because it’s baking, resulting in sesame cookies with crispier texture. The cookies, as soon as baked, may even have a pleasant and flat underside.
After I used parchment paper, the paper saved lifting off the sheet as I flattened the cookies. Parchment paper makes the flattening course of tougher, however not insufferable. It’s possible you’ll discover that a few of your cookies have a wrinkled underside as a result of the paper can wrinkle as a result of moisture within the dough.

DO NOT bake these cookies instantly on the baking sheet (i.e., an unlined baking sheet). The cookies will stick with the pan and also you’ll must scrape them off the baking sheet and doubtlessly wreck your baking sheets.
LIGHT VS DARK BAKING SHEETS
Most of my check batches of sesame cookies have been baked on light-colored aluminum sheet pans. Darker coloured baking sheets warmth up sooner than lighter coloured ones. If you’re utilizing darker sheets, cut back the cooking time by about 2 to three minutes and test the progress of the cookies. They might be executed once you first test them, or they might want an additional minute or two.
STACKING UP BAKING SHEETS
While you stack up baking sheets, you’ll decelerate the browning means of the underside no matter you’re baking. I prefer to stack baking sheets after I make my pineapple buns or Chinese language BBQ pork buns. I assumed stacking the baking sheets on this recipe would yield extra evenly baked cookies, however in actuality, it simply elevated the cooking time of the cookies with out making the browning extra even.
CAN I MAKE THE DOUGH AHEAD?
Sure, as a matter of reality, I typically ready the dough in a single day to interrupt up the work. It would final within the fridge for as much as 2 days. You possibly can freeze the dough for a number of months, however you’ll must defrost it within the fridge earlier than scooping and flattening the dough earlier than baking.
CAN I DOUBLE THE BATCH?
Sure! It’ll take extra baking time, as try to be solely baking one sheet at a time.
HOW LONG WILL THE COOKIES LAST?
These cookies will keep crunchy for as much as per week, supplied that they have been baked evenly initially.

MORE RECIPES USING BOB’S RED MILL ALL-PURPOSE FLOUR
Servings: 24 cookies
Skinny Ginger & Sesame Cookies
Components
- 1/3 cup + 4 teaspoons (50g) all-purpose flour , (see be aware 1)
- 1 tablespoon (7g) floor ginger
- 7 tablespoons (70g) uncooked white sesame seeds, can use a combo of white and black sesame seeds (see be aware 2)
- 2 giant egg whites
- 5 tablespoons (70g) unsalted butter
- 1/3 cup (66g) granulated sugar
- 1/8 teaspoon positive sea salt, or 1/4 teaspoon kosher salt
- 1 teaspoon vanilla extract
- 2 tablespoons (20g) finely chopped crystallized (or candied) ginger, (see be aware 3)
- cooking spray, (see be aware 4)
Directions
Preheat the Oven
-
Place an oven rack to the middle of the oven.
-
If you’d like cookies with extra even browning that look extra visually interesting (see photograph beneath, left), preheat the oven to 275ºF (135ºC). The cookies might want to bake for an extended interval due to the decrease temperature.
-
If you’d like cookies which have richer caramelized taste and a shorter baking time, preheat the oven to 300ºF (148ºC). Word that the perimeters of the cookies will likely be darker brown than the middle (see photograph above, proper).
Form Cookie Dough
-
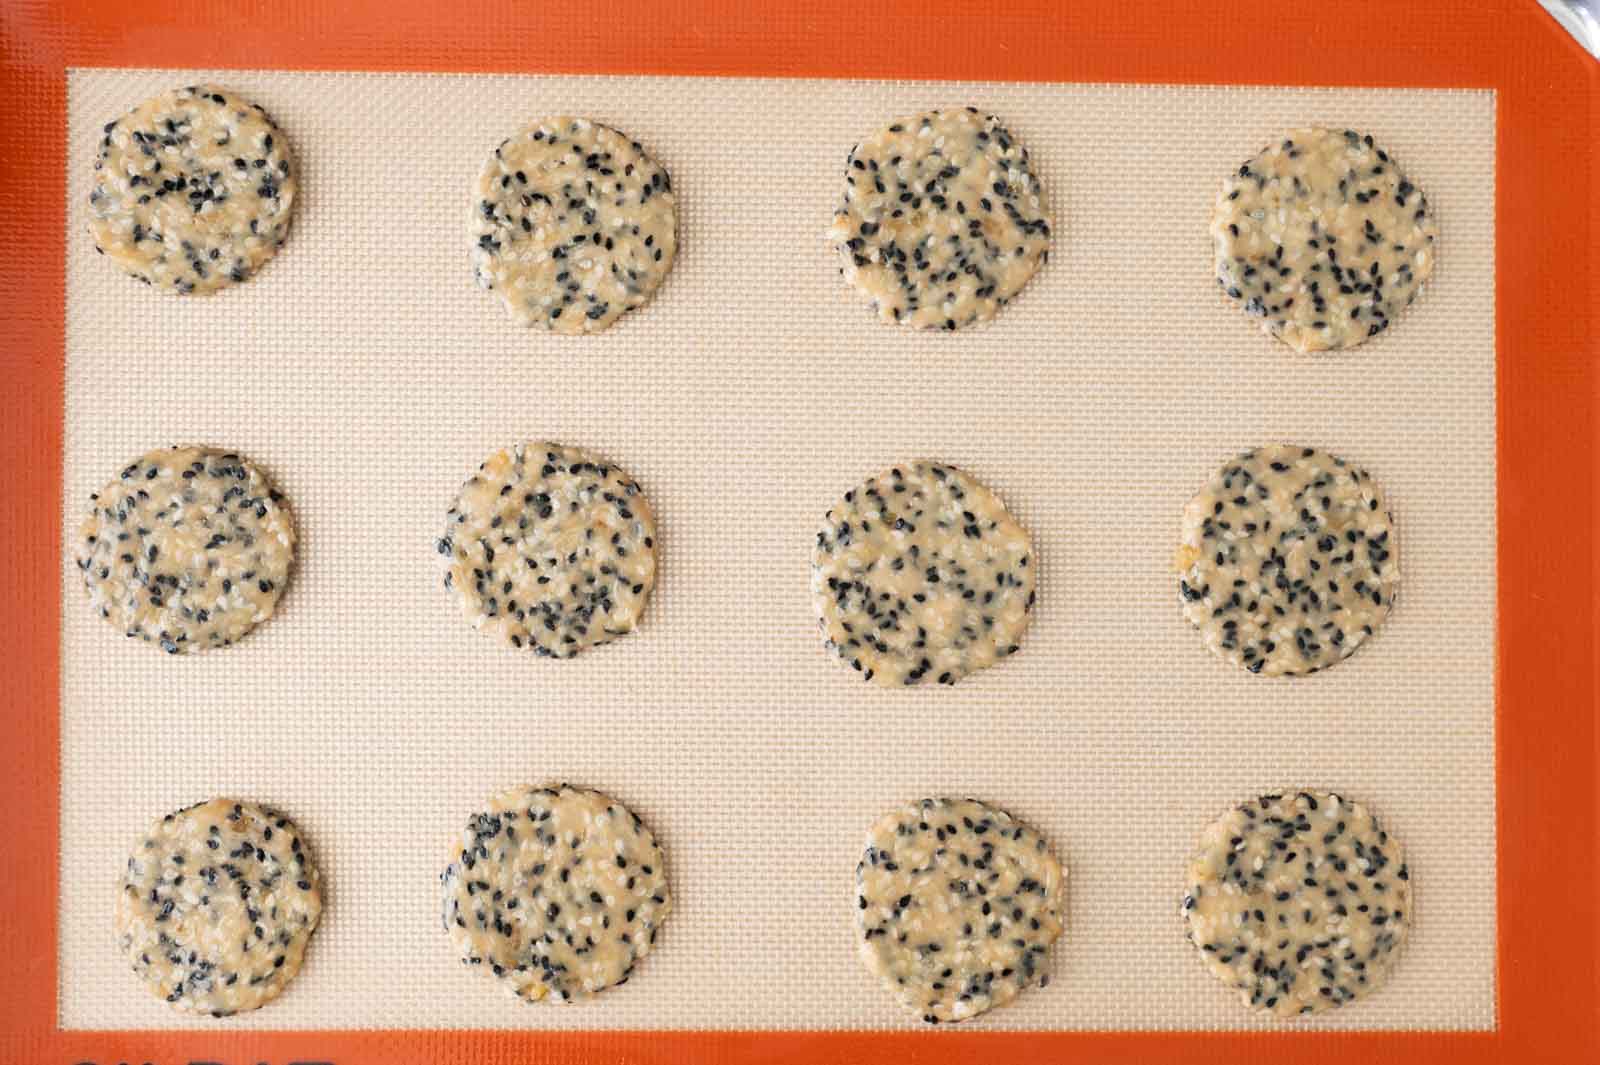
If attainable, use a small cookie scoop to measure out the dough. Stage off the highest of the cookie scoop earlier than putting a bit of dough onto the lined baking sheet. Add 12 items of cookie dough onto a baking sheet, leaving about 1.5 to 2 inches of area between every ball of dough.
-
In the event you don’t have a small cookie scoop, spray a teaspoon measuring spoon with cooking spray and measure 2 teaspoons of dough for every cookie. You’ll must roll up the dough right into a ball with greased fingers. If that’s too time consuming, you may make barely bigger cookies with a tablespoon measure. If the dough begins sticking to the spoon, apply extra cooking spray to the measuring spoon.
-
Use cooking spray to grease each side of a mini silicone spatula or the underside of a ingesting glass or measuring cup. Utilizing a silicone spatula provides you essentially the most management over shaping the cookies, however utilizing a ingesting glass or measuring cup is quicker.
-
In the event you’re utilizing a silicone spatula, begin by gently urgent the spatula down on a bit of cookie dough. Then, raise the spatula and press down on one other a part of the cookie to flatten it. Preserve urgent and lifting the spatula till you get a flat disc of about 2 inches in diameter. Resist the urge to pull the spatula over the cookie dough to attempt to form it right into a circle. The dough will stick with the spatula extra shortly this manner.
-
Alternatively, press the underside of the greased glass or measuring cup over a bit of dough to flatten it right into a circle of about 2 inches in diameter. The circle may not be completely spherical, so use a greased spatula or butter knife to shift the perimeters right into a neat circle.
-
When the dough is beginning to stick with the spatula, glass, or measuring cup, reapply cooking spray. I prefer to spray a small bowl with cooking spray in order that I can simply reapply cooking spray with my fingers.
-
When you’ve flattened all 12 cookies, they’re able to bake. Place the remaining cookie dough again into the fridge.
Bake Cookies at 275ºF (135ºC) (Extra Even Browning, Longer Baking Time)
-
Switch the baking sheet to the oven and bake the cookies for quarter-hour. At this level, the cookies ought to nonetheless look fairly pale and have barely began to show brown on the backside. Flip the baking sheet round and bake the cookies for one more quarter-hour.
-
Take the cookie sheet out of the oven and test the colour of the cookies. In the event that they’re beginning to flip golden across the edges, however the middle remains to be very pale, they’re doubtless not executed but. Flip over among the cookies and test the underside. You’re searching for cookies with even golden bottoms. If there are giant spots within the middle which are nonetheless pale, they’re not prepared to come back out of the oven. All of the cookies must be evenly golden on the backside to ensure that them to snap properly.
-
Preserve baking the cookies at 2 to three minute intervals till all of the cookies have a fair golden shade on the prime and the bottoms are good and golden (see photograph beneath for a visible reference). Additionally be aware of which cookies are browning rather a lot sooner than the others, as they received’t want as a lot baking time and may be transferred to a cooling rack sooner. For reference, I typically bake the cookies for an extra 3 minutes (after the preliminary half-hour of baking). Then, I test the cookies and pull out any that look very golden. Then, I often bake any remaining cookies at 2-minute intervals till they’re evenly golden. Your cookies might have roughly time.
-
As soon as all of the cookies are executed baking, switch them to a cooling rack. The cookies will proceed to crisp up as they cool.
Bake Cookies at 300ºF (148ºC) (Extra Caramelization, Shorter Baking Time)
-
Switch the baking sheet to the oven and bake the cookies for 12 minutes. At this level, you’ll be able to see the underside edges of the cookies simply begin to flip brown. Flip the baking sheet round and bake the cookies for one more 12 minutes.
-
Take the cookie sheet out of the oven and test the colour of the cookies. At this level, a lot of the cookies on my baking sheet have began to brown considerably and are almost executed. The perimeters of the cookies are usually darker than the middle. Flip the cookies round and test the underside. If they’re evenly golden brown, you’ll be able to take the cookies off the baking sheet and on to a cooling rack. If a number of or your entire cookies nonetheless haven’t browned sufficient, proceed cooking them at 2-minute intervals till all of them have good golden brown bottoms (see photograph beneath for reference).
-
As soon as all of the cookies are executed baking, switch them to a cooling rack. The cookies will proceed to crisp up as they cool.
Put together Second Batch
-
Whereas the primary batch of cookies are almost executed baking, put together the second batch. In the event you solely have one baking sheet or silicone mat, let these cool utterly earlier than including cookie dough to the baking sheet. Bake the second batch utilizing the instructions above.
-
As soon as cooled, test the snap of one of many cookies. If the facilities are good and crisp, they’ve been baked completely! Benefit from the cooled cookies with a cup of tea or serve them with ice cream! Retailer the cookies in an hermetic container for as much as per week.
Notes
- Measuring Flour: I measured the 1/3 cup of flour utilizing the spoon-and-sweep methodology. I didn’t measure the 4 extra teaspoons of flour utilizing that methodology, as it’s simpler simply to dip the teaspoon measure into the bag of flour.
- Sesame Seeds: If you wish to use a mix of white and black sesame seeds, I like to recommend utilizing 4 tablespoons (40g) of white sesame seeds and three tablespoons (30g) of black sesame seeds. If attainable, use uncooked seeds and toast them for 3 minutes. In the event you can solely discover pre-roasted sesame seeds, toast them in a pan over medium warmth for two minutes earlier than including to the batter.
- Crystallized Ginger: On the grocery retailer, you’ll doubtless discover 2 widespread forms of crystallized ginger: chopped up ginger chunks with a white powdery exterior or slices of candied ginger with granulated sugar coating the outside. Each varieties of crystallized ginger work nicely for this recipe. Nevertheless, the candied ginger slices are usually stickier, in order that they’re a bit of tougher to cut up. Use whichever crystallized ginger you could find!
- Cooking Spray works greatest to forestall the cookie dough from sticking to your spatulas, cups, measuring spoons, and so forth. You should use common oil however you’ll doubtless must reapply the oil extra typically.
- Mild vs Darkish Baking Sheets: Most of my check batches of cookies have been baked on light-colored aluminum sheet pans. Darker coloured baking sheets warmth up sooner than lighter coloured ones. If you’re utilizing darker sheets, cut back the cooking time by about 2 to three minutes and test the progress of the cookies. They might be executed once you first test them, or they might want an additional minute or two.
- Silicone Mats: I like to recommend lining your baking sheets with silicone mats, when you’ve got them. Silicone mats encourage the dough to unfold extra because it’s baking, resulting in cookies with crispier texture. The cookies, as soon as baked, may even have a pleasant and flat underside. The cookie dough is tougher to form on parchment paper as a result of the paper retains lifting as you flatten the cookies.
- Further Cooking Time References: I exploit an electrical double oven with oven slots which are smaller than the usual slide-in oven ranges within the US. That’s why I requested my assistant to check the recipe in a fuel oven that’s extra of the usual dimension. In addition they used cooking sheets lined with parchment paper as an alternative of silicone mats. General, their cookies wanted longer baking instances. When baking the cookies at 275ºF, they baked the cookies for the preliminary half-hour, then continued to bake the cookies at 2 to 3-minute intervals. Their cookies have been executed in round 37 minutes (whereas mine have been executed round 35 minutes). When baking cookies at 300ºF, they baked the cookies for the preliminary 24 minutes, then continued to bake the cookies at 2 to 3-minute intervals. Their cookies have been executed at about 27 to 29 minutes (some browned rather a lot sooner).
Diet
Serving: 2cookies | Energy: 143kcal | Carbohydrates: 16.6g | Protein: 2.7g | Fats: 7.5g | Saturated Fats: 3.4g | Sodium: 36mg | Fiber: 1g | Sugar: 6.7g
Disclosure: This submit was sponsored by Bob’s Crimson Mill! To study extra about their merchandise and to get extra recipe inspiration, comply with them on Instagram or Fb.
[ad_2]